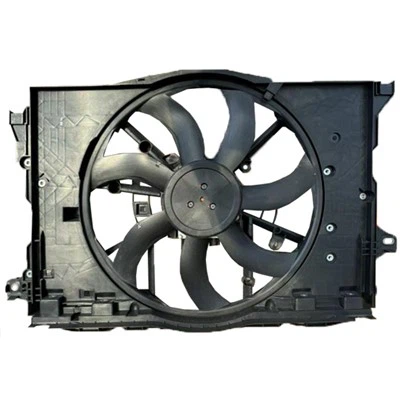
Radiator Fan Motor Replacement: A User's Guide for Experienced Mechanics
Welcome to the comprehensive user's guide for replacing a radiator fan motor. This guide is tailored for experienced mechanics working in repair auto shops. Whether your client's car needs a new radiator cooling fan due to failure or you're performing a diagnostic check, this guide will walk you through the process of removing the defective unit and installing a replacement radiator motor fan.

In a repair auto shop, it's not uncommon for clients to come in with cooling system issues. One key component of the cooling system is the radiator cooling fan. While the radiator cooling fan is not a scheduled maintenance item, it should be replaced when it fails. This guide will help you diagnose the problem, remove the faulty fan, and install a new one.
Tools and Materials Needed
- New radiator fan motor
- Screwdrivers (flathead and Phillips)
- Socket set and ratchet
- Pliers
- Multimeter
- Safety gloves and goggles
- Anti-seize lubricant
- Service manual for the specific vehicle model
Diagnosing the Problem
1. Initial Inspection:
Visual Check:Inspect the radiator fan for visible damage such as broken blades or disconnected wires.
Noise Check: Listen for unusual noises like grinding or squealing, which may indicate a failing motor.
2. Testing the Fan Motor:
Electrical Test: Use a multimeter to check the voltage at the radiator fan motor connector.
If the voltage is within the specified range but the fan doesn't operate, the motor is likely faulty.
Manual Spin Test:* Try to spin the fan blades manually. Resistance or roughness indicates potential motor issues.
Removing the Defective Radiator Fan Motor
Installing the Replacement Radiator Fan Motor
1. Preparing the New Fan Motor:
Ensure the new radiator fan motor matches the specifications of the old one. Check the fan blades, motor size, and electrical connections.
Apply a small amount of anti-seize lubricant to the mounting bolts to make future removal easier.
2. Installing the New Fan Assembly:
Place the new fan assembly into the same position as the old one, ensuring it fits securely.
Align the mounting holes and insert the bolts. Tighten them to the manufacturer's specified torque.
3. Reconnecting Electrical Connections:
Reattach all electrical connectors to the new fan motor. Ensure each connector is securely fastened and properly seated.
4. Reinstalling Removed Components:
Replace any components you removed to access the radiator fan, such as covers, shrouds, or the air intake.
5. Final Checks:
Reconnect the battery and start the engine. Allow it to reach operating temperature to ensure the fan engages as required.
Observe the fan operation for a few minutes to ensure it runs smoothly without unusual noises or vibrations.
Replacing a radiator fan motor is a task that requires attention to detail and adherence to safety protocols. By following this guide, experienced mechanics can efficiently diagnose the issue, remove the defective unit, and install a new radiator fan motor, ensuring the client's car runs smoothly and efficiently. Remember, while the radiator cooling fan is not a scheduled maintenance item, it plays a crucial role in the overall health of the engine. Proper installation and verification are key to delivering a successful repair and satisfied clients.